It is possible to install ImageCapture on multiple devices so that multiple users can use it on their own laptops.
For this, we have a download folder that contains the output file and a README text file.
Step plan:
- Copy the relevant file to the end user's PC/laptop and run it. In the steps to follow, there is no need to select any specific settings and you can continue clicking.
- Once the installation is complete, one more setting needs to be configured for the user to use ImageCapture.
- Open the ImageCapture Manager on the user's PC/laptop. (You do not need to be an administrator in ImageCapture for this step).
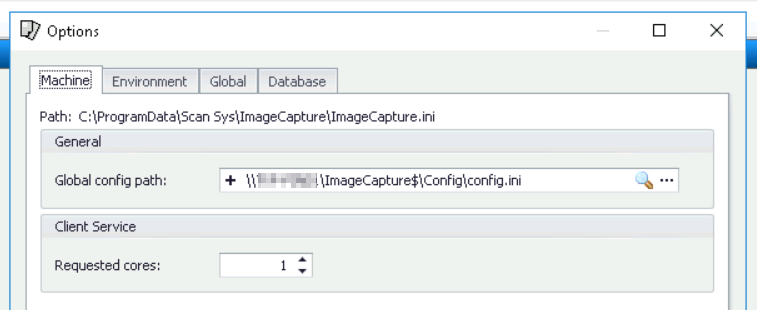
- Close the login screen and navigate to: Tools > Options > Machine.
- In the 'Machine' tab is a path are with a reference to a configuration file located on the application server.
- You can find the path by opening ImageCapture on the application server. Again, navigate to Tools > Options > Machine and copy the path it contains to the user's. This path should look something like this: \\{Server}\ImageCapture\Config... or \{Server}\ImageCapture$\Config\...ini
(You can also find out this path by retrieving it from an existing user in the ImageCapture Admin).
If not, you can ask us at support for support. We can then set up this path for you. - Place the copied path in the manager with the user and click 'OK'.
- The installation is complete, and the user can now use ImageCapture.