In this article, you can find out how to create a user within ImageCapture. If you add a user here, it will only be a user within ImageCapture.*
To create a user in ImageCapture, your own user account must have administrator rights in ImageCapture.
Follow these steps:
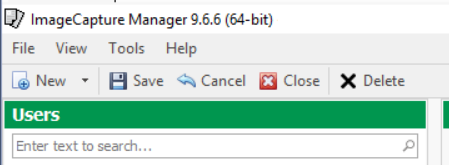
| 1 | Navigate to 'Image Capture Manager'. |
| 2 | Select the 'Users' option (at the bottom left of the screen). |
| 3 | Select the 'New' option (at the top left of the screen). |
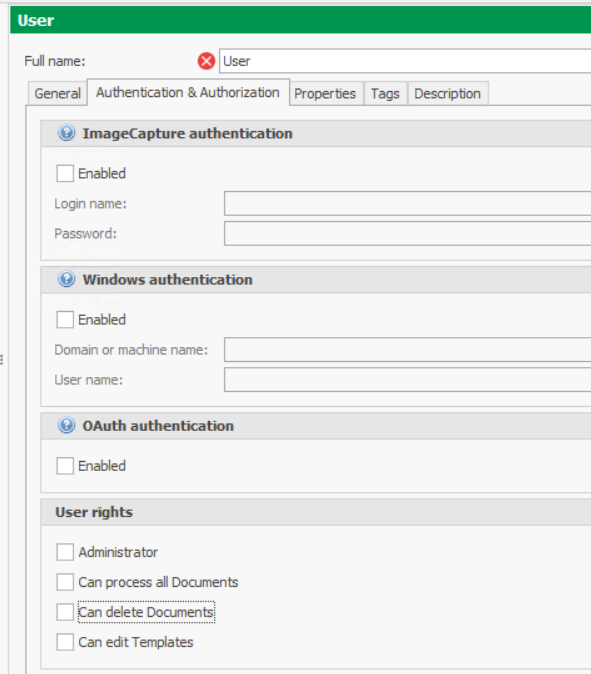
| 4 | Enter the name of the user under 'Fullname'. |
| 5 | Specify how the user will log in. Tip! Check how this is set for other users and follow the same method. |
| 5.a | If you are using 'ImageCapture authentication', enter a username and password, and don't forget to check the box at 'Enabled.' |
| 5.b | In case of 'Windows Authentication': check the box at 'Enabled' and enter the Windows username of the relevant user. |
| 6 | Then select the user rights. |
| 7 | Finally, click the 'Save' button (at the top left of the screen). |
If the user logs in via 'Windows Authentication', the following should be selected when the user tries to log into ImageCapture. He/she then only needs to click 'OK'.

* A separate user must be created for Easy Invoice, Easy Expense and/or Easy Purchase.